Power BI Integration
Dette indhold er ikke tilgængeligt i dit sprog endnu.
SimpleAPI offers two connection options for Power BI:
- A Power BI connector file that you need to download and install
- A Power Query connection between Business Central and Power BI.
We recommend choosing the second option. The connector will require an On-Prem Data connector to be used even in cloud when a report is published.
Currently the best performance is found with the XML File Power Query. Therefore, this is the recommended choice.
Power BI File Connection
Section titled “Power BI File Connection”Note: This connector will not change for new versions of the SimpleAPI App. There may be changed in the BC app, but it will be kept backwards compatible. If changes are necessary, that will not allow backwards compatibility, a new version of the Power BI connector will be made in addition to the existing, to not disturb already dependent reports and dashboards.
-
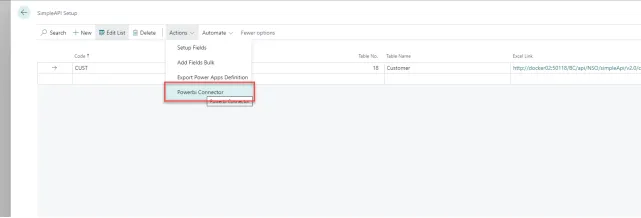
Navigate to the “SimpleAPI Setup” page, from here you can go to “More options” -> “Action” -> “PowerBI Connector”, this will add the Connector .mez file to your download folder.

-
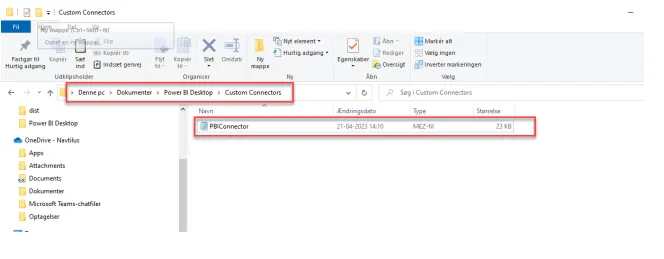
The .mez file is the way to make custom connectors for Power BI but it requires moving the file to the right folder for power bi to recognize the file. Required folder is “this pc\Documents\Power BI Desktop\Custom Connectors”.
- If you do not have this folder, you can make it yourself.
- Go to “This Computer” -> “Documents” -> Create a new folder called “Power BI Desktop” -> Open the folder and create one more called “Custom Connectors”
- Go to “This Computer” -> “Documents” -> Create a new folder called “Power BI Desktop” -> Open the folder and create one more called “Custom Connectors”
- If you do not have this folder, you can make it yourself.
Once the file is placed in the folder you need to restart your Power BI
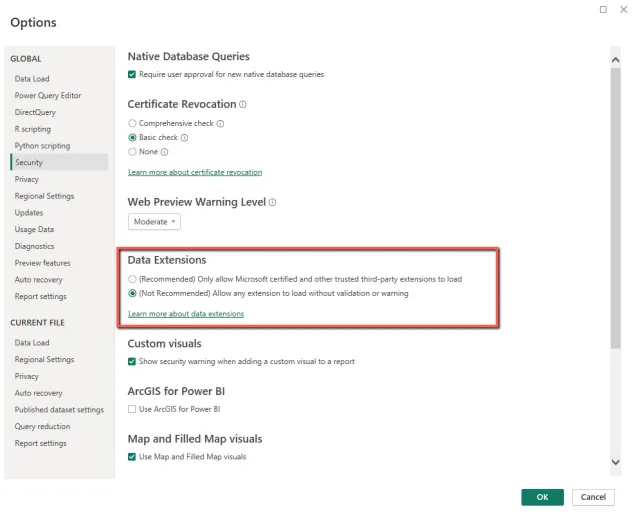
Note: For some people you might get a warning message when opening the Power BI. Press OK and do as following:
-
In Power BI Desktop go to “File” -> “Options and settings” -> “Options” -> “Security” -> Change the selected under “Data Extensions”.
-
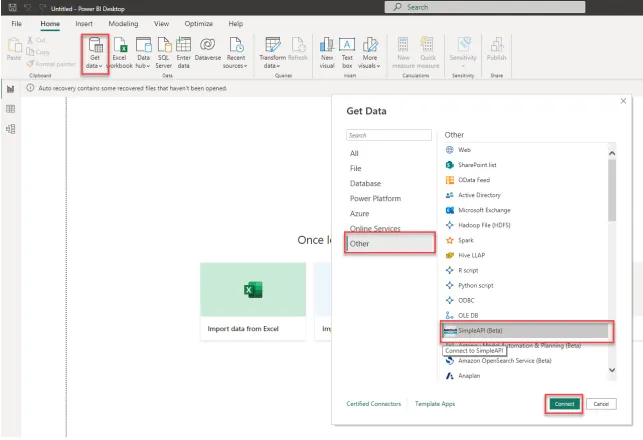
After this you should be able to find the Connector in “Get data” -> “More” -> “Other” -> SimpleAPI
-
You might get a warning about “connection to a third-party service”, just press continue here.
-
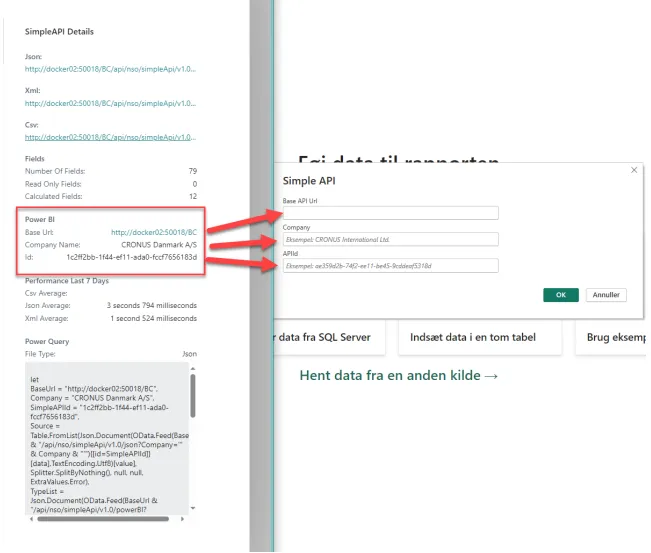
After clicking connect a window is opening asking for three parts of information’s
-
Input the information in Power BI and click ok.
-
In our example the box looks like the picture underneath, yours should have your company’s information inside it instead.
-
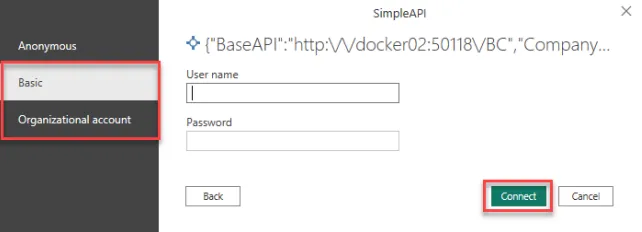
Login with the business central login, either use the basic or the Organizational account.
-
The SimpleAPI connector will then give you access to the selected Business Central fields on the selected tables in Power BI (Check the “How to setup” instructions, for managing fields).
This concludes the setup instructions for the Power BI integration, from here it becomes a matter of using the data in Power BI.